White chocolate fruit and nut candy bars are one of the easiest homemade treats you can prepare. They require very little effort, no baking, and only a few ingredients. These bars combine creamy white chocolate with colorful dried fruits, nuts, and soft candy pieces, creating a delicious combination of sweetness and texture. Their rich flavor and vibrant appearance make them perfect for holidays, celebrations, gifting, or everyday snacking.
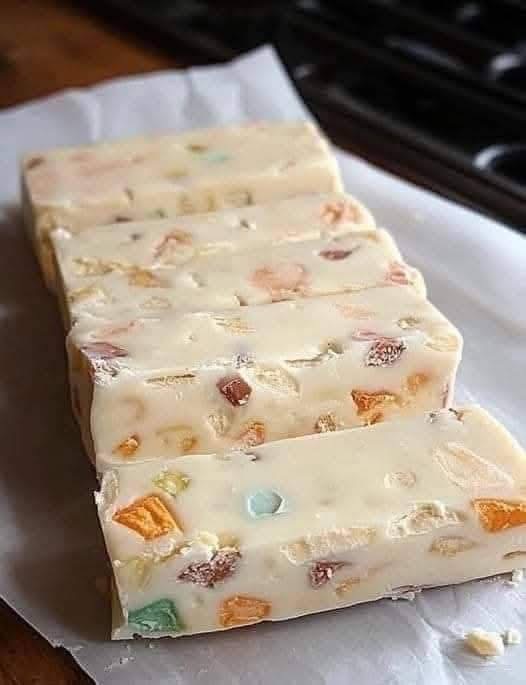
The bars in the image show smooth, creamy white chocolate packed with colorful bits. Each slice reveals a mix of textures—soft, chewy, crunchy, and creamy. This recipe is ideal for beginners, kids, or anyone who wants a quick dessert that looks impressive but takes only minutes to make.
Ingredients
- 3 cups white chocolate chips or chopped white chocolate
- 1 cup mixed dried fruits (apricots, pineapple, mango, cherries)
- ½ cup mixed nuts (almonds, pistachios, cashews, or pecans)
- ½ cup mini marshmallows or soft candy pieces
- 1 teaspoon vanilla extract
Instructions
Begin by preparing a loaf pan or small rectangular dish. Line it with parchment paper to make removing the candy easier once it sets. Chop the dried fruits and nuts into small, bite-sized pieces so they distribute evenly throughout the chocolate.
Melt the white chocolate using a double boiler or microwave. If you use a microwave, heat in 20–30 second intervals, stirring between each round to prevent burning. Once fully melted and smooth, stir in the vanilla extract. Add the dried fruits, nuts, and candy pieces to the melted chocolate, mixing until everything is evenly coated.
Pour the mixture into the prepared pan and spread it evenly. Tap the pan gently on the counter to remove air bubbles. Allow the candy to cool and firm up at room temperature or place it in the refrigerator for faster setting. Once solid, lift the block from the pan using the parchment paper and slice it into bars.
Texture and Flavor
These candy bars offer a delightful balance of creamy, crunchy, fruity, and chewy textures. The white chocolate provides a rich, smooth base that pairs beautifully with dried fruits like apricots, mangoes, and cherries. Nuts add a satisfying crunch, while mini marshmallows or soft candy bits bring a tender chew that complements the melt-in-your-mouth chocolate.
The variety of colors from the fruits and candies makes the bars visually appealing, making them perfect for gift boxes, dessert platters, or special occasions.
Tips for Best Results
Use high-quality white chocolate for the best flavor and smooth melting. White chocolate can scorch easily, so melt it slowly. If the chocolate thickens while mixing, warm it briefly to soften it again.
Chop ingredients uniformly for even distribution. Avoid adding ingredients with excess moisture, as they can affect the chocolate’s texture. If the bars will be stored for a long time, avoid fresh fruit and stick to dried options.
Press the mixture gently before chilling to remove gaps and create a smooth, firm block. For neat slices, run a warm knife through hot water, dry it, and cut the bars cleanly.
Serving Suggestions
These bars are perfect as:
- Holiday treats
- Coffee-side snacks
- Party desserts
- Edible gifts in small bags or boxes
- Lunchbox additions
You can also cut them into smaller squares for candy platters or create themed mixes using different colors and flavors.
Variations
This recipe is highly customizable. Try adding:
- Crushed cookies for crunch
- Toasted coconut for aroma
- Freeze-dried berries for tartness
- Caramel bits for sweetness
- Colored sprinkles for a fun look
You can also experiment with flavors by adding a few drops of almond extract, orange zest, or a pinch of sea salt.
For a richer version, swirl in a little melted milk chocolate or dark chocolate before the mixture sets. This creates a marble pattern and adds depth of flavor.
Storage
Store the candy bars in an airtight container at room temperature for up to a week. If your environment is warm, refrigerate them to prevent melting. For longer storage, freeze the bars for up to two months. Place parchment paper between layers to prevent sticking. Thaw at room temperature before eating for the best texture.
Why This Recipe Works
This recipe succeeds because of its simplicity and versatility. White chocolate melts smoothly and binds the mix-ins together, creating a stable candy that slices beautifully. The combination of fruity sweetness and nutty crunch ensures every bite is satisfying. With no baking required and very little active time, it’s perfect for busy days or last-minute desserts.
The bars also look impressive despite being incredibly easy to make. Their colorful pieces stand out beautifully against the creamy white chocolate, making them ideal for gifting and celebrations. Because the recipe is flexible, you can adjust the ingredients to fit your preferences or whatever you have on hand.