There is something incredibly satisfying about pulling a beautiful golden loaf of homemade bread out of the oven. The crisp, crackly crust, the soft and airy center, and the irresistible aroma filling your kitchen make every minute of waiting worthwhile. The best part? You don’t need to be an experienced baker to make bakery-quality bread at home.
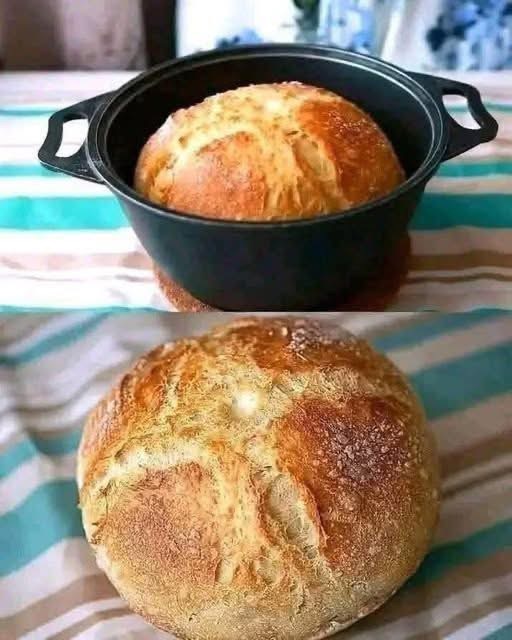
This Dutch oven no-knead bread recipe has become a favorite for home bakers because it requires only a few simple ingredients and very little effort. The long resting time allows the dough to develop flavor naturally, while the Dutch oven creates the perfect environment for a crisp crust and fluffy interior.
Whether you’re serving it alongside soup, making sandwiches, or simply enjoying a warm slice with butter, this rustic loaf is sure to become one of your favorite homemade recipes.
Why You’ll Love This Bread
- No kneading required.
- Crispy artisan-style crust.
- Soft, chewy interior.
- Only four basic ingredients.
- Beginner-friendly recipe.
- Perfect for soups, pasta, sandwiches, and breakfast.
- Budget-friendly and better than store-bought bread.
Ingredients
You’ll only need a handful of pantry staples.
- 3 cups all-purpose flour
- 1½ teaspoons salt
- ½ teaspoon instant yeast
- 1½ cups warm water
Optional:
- Extra flour for dusting
- Cornmeal or parchment paper for easier handling
Kitchen Equipment
- Large mixing bowl
- Wooden spoon or spatula
- Plastic wrap or kitchen towel
- Dutch oven with lid
- Parchment paper
- Cooling rack
Step 1: Mix the Dough
In a large bowl, combine the flour, salt, and instant yeast.
Pour in the warm water.
Stir everything together until no dry flour remains. The dough will look sticky, shaggy, and somewhat messy. This is exactly what you want.
Do not knead the dough.
Cover the bowl with plastic wrap or a clean towel.
Step 2: Let the Dough Rise
Allow the dough to rest at room temperature for 12 to 18 hours.
During this long rise, natural fermentation develops flavor and creates the airy texture that makes artisan bread so delicious.
By morning, the dough should be full of bubbles and roughly doubled in size.
Step 3: Shape the Dough
Lightly flour your work surface.
Gently turn the dough out onto the flour.
Using floured hands, fold the edges toward the center several times until you form a loose round loaf.
Avoid pressing too hard since you want to keep as much air inside the dough as possible.
Place the dough on parchment paper.
Cover it again and let it rest for another 30 to 45 minutes.
Step 4: Preheat the Dutch Oven
While the dough rests, place your empty Dutch oven with the lid inside your oven.
Preheat to 450°F (230°C).
Allow the Dutch oven to heat for at least 30 minutes.
This step is essential because the hot pot creates steam that produces the beautifully crispy crust.
Step 5: Bake the Bread
Carefully remove the hot Dutch oven.
Using the parchment paper, gently lower the dough into the pot.
Place the lid on immediately.
Bake for:
- 30 minutes covered
- Remove the lid
- Bake another 15 to 20 minutes until the crust becomes deep golden brown.
The loaf should sound hollow when tapped on the bottom.
Step 6: Cool Before Slicing
Transfer the bread to a cooling rack.
Allow it to cool for at least one hour.
Although it can be tempting to slice into it immediately, cooling helps the crumb finish setting, resulting in a better texture.
Tips for Perfect Homemade Bread
Measure Flour Correctly
Too much flour can make the bread dense.
Spoon the flour into your measuring cup and level it instead of scooping directly from the bag.
Don’t Rush the Rise
The overnight fermentation is what creates the wonderful flavor and airy texture.
Patience makes all the difference.
Keep the Dough Sticky
Sticky dough produces lighter bread.
Avoid adding too much extra flour while shaping.
Preheat Thoroughly
A fully heated Dutch oven gives your loaf the professional bakery-style crust.
Delicious Add-Ins
This simple bread recipe can easily be customized.
Try adding:
- Fresh rosemary
- Roasted garlic
- Cheddar cheese
- Parmesan
- Jalapeños
- Sun-dried tomatoes
- Everything bagel seasoning
- Cracked black pepper
- Italian herbs
- Chopped olives
Each variation creates a unique homemade loaf.
What to Serve with Homemade Bread
Fresh bread pairs wonderfully with countless meals.
Some favorite options include:
- Tomato soup
- Beef stew
- Chicken noodle soup
- Creamy pasta
- Garlic butter
- Olive oil and balsamic vinegar
- Homemade jam
- Peanut butter
- Breakfast eggs
- Grilled cheese sandwiches
It also makes incredible toast the next morning.
Storage Tips
Store the cooled bread in a paper bag or bread box at room temperature for up to three days.
Avoid refrigerating homemade bread, as it can dry out more quickly.
If you want to keep it longer, slice the loaf and freeze it in a freezer-safe bag for up to three months.
Simply toast frozen slices whenever needed.
Common Mistakes to Avoid
- Using water that is too hot and damaging the yeast.
- Skipping the long rise.
- Adding too much flour during shaping.
- Baking in a cold Dutch oven.
- Cutting the loaf while it’s still hot.
Avoiding these simple mistakes will give you consistently delicious results.
Frequently Asked Questions
Can I use bread flour?
Yes. Bread flour produces a slightly chewier texture and a stronger structure.
Can I make this without a Dutch oven?
Yes. A heavy oven-safe pot with a tight-fitting lid works well. You can also bake it on a baking stone while creating steam with a pan of hot water.
Why is my bread dense?
Usually because too much flour was added or the dough didn’t rise long enough.
Can I double the recipe?
Absolutely. Use a larger Dutch oven or divide the dough into two separate loaves.
Final Thoughts
Making homemade artisan bread doesn’t have to be difficult. With just a few pantry ingredients, a little patience, and a Dutch oven, you can create a loaf with a beautifully crisp crust and a soft, airy center that rivals bread from your favorite bakery.
Once you try this no-knead bread recipe, you’ll discover how rewarding baking from scratch can be. Serve it warm with butter, pair it with your favorite soup, or use it for hearty sandwiches. No matter how you enjoy it, this rustic loaf is sure to become a recipe you’ll bake again and again.