Homemade Sweetened Condensed Milk: Creamy, Smooth and Easy to Make at Home
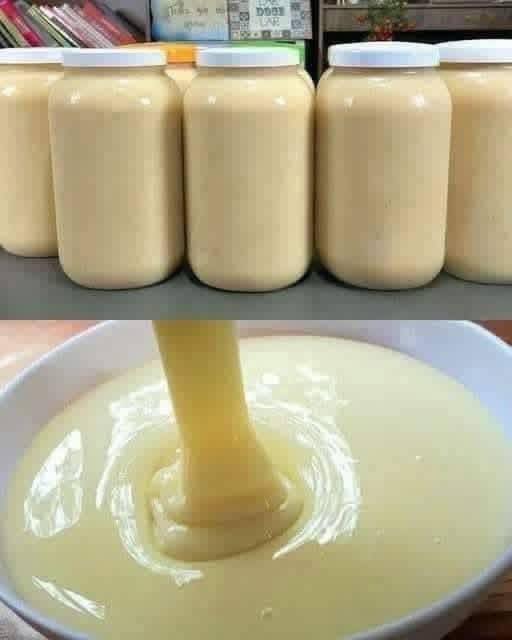
Sweetened condensed milk is one of those kitchen staples that many people love but rarely consider making from scratch. It has a rich, silky texture and a sweetness that enhances desserts, beverages and baked goods. While store-bought cans are convenient, homemade condensed milk offers something entirely different. It delivers a fresher taste, a customizable sweetness level and the comfort of knowing exactly what ingredients went into it. Making it at home is easier than most expect, and the result can be stored in jars just like the ones in the image, ready for use anytime you need a touch of creaminess.
Homemade condensed milk is simply milk simmered gently with sugar until it reduces into a thick, glossy mixture. As it cooks, the milk transforms into a concentrated, velvety base that can be used in cakes, puddings, candies, coffee drinks and countless recipes. The process requires patience but not much effort. A good heavy pot, low heat and the occasional stir are all that is needed to create a batch of delicious condensed milk that rivals or even surpasses the store-bought version.
This recipe is especially helpful for those who love cooking and baking regularly. Having jars of homemade condensed milk in the refrigerator makes it easy to whip up a dessert without running to the store. It’s also ideal for people who prefer natural ingredients, as you can adjust the recipe to suit your preferences. Whether you enjoy it extra thick, mildly sweet or flavored with vanilla, the homemade version lets you experiment and enjoy full control over the result.
Ingredients
4 cups whole milk
1 and 1/4 cups sugar
2 tablespoons butter
1 teaspoon vanilla extract (optional)
How to Prepare Homemade Sweetened Condensed Milk
Start by pouring the whole milk into a heavy-bottomed saucepan. A sturdy pot helps prevent scorching during the long simmer. Add the sugar and stir well to dissolve it as the mixture warms. Bring the milk to a gentle simmer over medium heat, then reduce the heat to low. It is important for the mixture to simmer slowly rather than boil vigorously. Slow cooking develops the thick, creamy texture that condensed milk is known for.
Allow the mixture to cook uncovered for about one hour to one hour and fifteen minutes. Stir occasionally to prevent sticking at the bottom. As the mixture reduces, the color will deepen slightly to a pale cream shade, and the consistency will thicken. If foam appears on top, gently skim it off to keep the liquid smooth.
Once the mixture has reduced by about half and has noticeably thickened, turn off the heat. The condensed milk will continue to thicken as it cools, so do not worry if it still seems slightly loose at this stage. Stir in the butter to give it a glossy finish and richer flavor. If you want a hint of vanilla, add the extract and mix well.
Allow the mixture to cool completely before transferring it to clean, dry jars. The texture will become thicker and more luscious once refrigerated. Store the jars in the refrigerator for up to one week or freeze them for longer storage. When ready to use, simply warm a spoonful if needed to bring it back to its smooth, pourable consistency.
Why Homemade Condensed Milk Is Worth Making
Many people who try homemade condensed milk find it richer and more flavorful than the canned version. The slow reduction process allows the natural sweetness of milk to shine through, while the sugar caramelizes slightly to create depth. You can tailor the sweetness to your preference by adjusting the sugar. If you prefer a lighter version, reduce the sugar slightly. For an extra thick result, extend the cooking time a bit more.
Another advantage is the absence of additives. Store-bought condensed milk often contains stabilizers or preservatives. Homemade condensed milk contains only milk, sugar, butter and optional flavoring, making it ideal for those who enjoy natural ingredients.
It is also cost-effective. Large batches can be made for the price of a few simple ingredients, then stored in jars to be used anytime. For anyone who bakes frequently, this is a valuable convenience.
Uses for Homemade Sweetened Condensed Milk
This homemade version works beautifully in a variety of recipes. It is essential for many popular desserts such as caramel pie, key lime pie, tres leches cake and cheesecake bars. It enriches chocolate fudge, smooths out puddings and adds body to ice cream bases. It is also delightful stirred into iced coffee, milk tea or homemade chai. Even a spoonful drizzled over fruit or toast creates a simple, indulgent treat.
If you enjoy making candies like brigadeiros or caramel sauce, homemade condensed milk gives a truer, richer flavor. It also blends wonderfully into no-bake desserts, mousse recipes and smoothie bowls. The possibilities are endless once you have a jar ready in your refrigerator.
Tips for the Best Results
Keep the heat low to avoid burning the milk, as scorched milk changes the flavor.
Stir occasionally, especially during the last half of the cooking time.
Use whole milk for the creamiest result, as low-fat milk produces a thinner version.
If the mixture appears grainy, strain it through a fine sieve before storing.
For flavored versions, add vanilla, almond extract or even a pinch of salt for balance.
A Homemade Treat You’ll Want to Make Again
Homemade sweetened condensed milk is a true kitchen treasure. It takes a bit of time but very little effort, and the result is smooth, rich and far better than what comes in a can. Once you try it, you might find yourself preparing it regularly, filling jars and storing them just like the ones in the photograph.
From enhancing desserts to sweetening beverages, this creamy homemade mixture adds comfort and flavor to whatever you use it in. With just a pot, milk, sugar and patience, you can create a condensed milk that is both delicious and versatile. It is a reminder that some of the best kitchen staples are the ones we can make ourselves with simple ingredients and a little time.