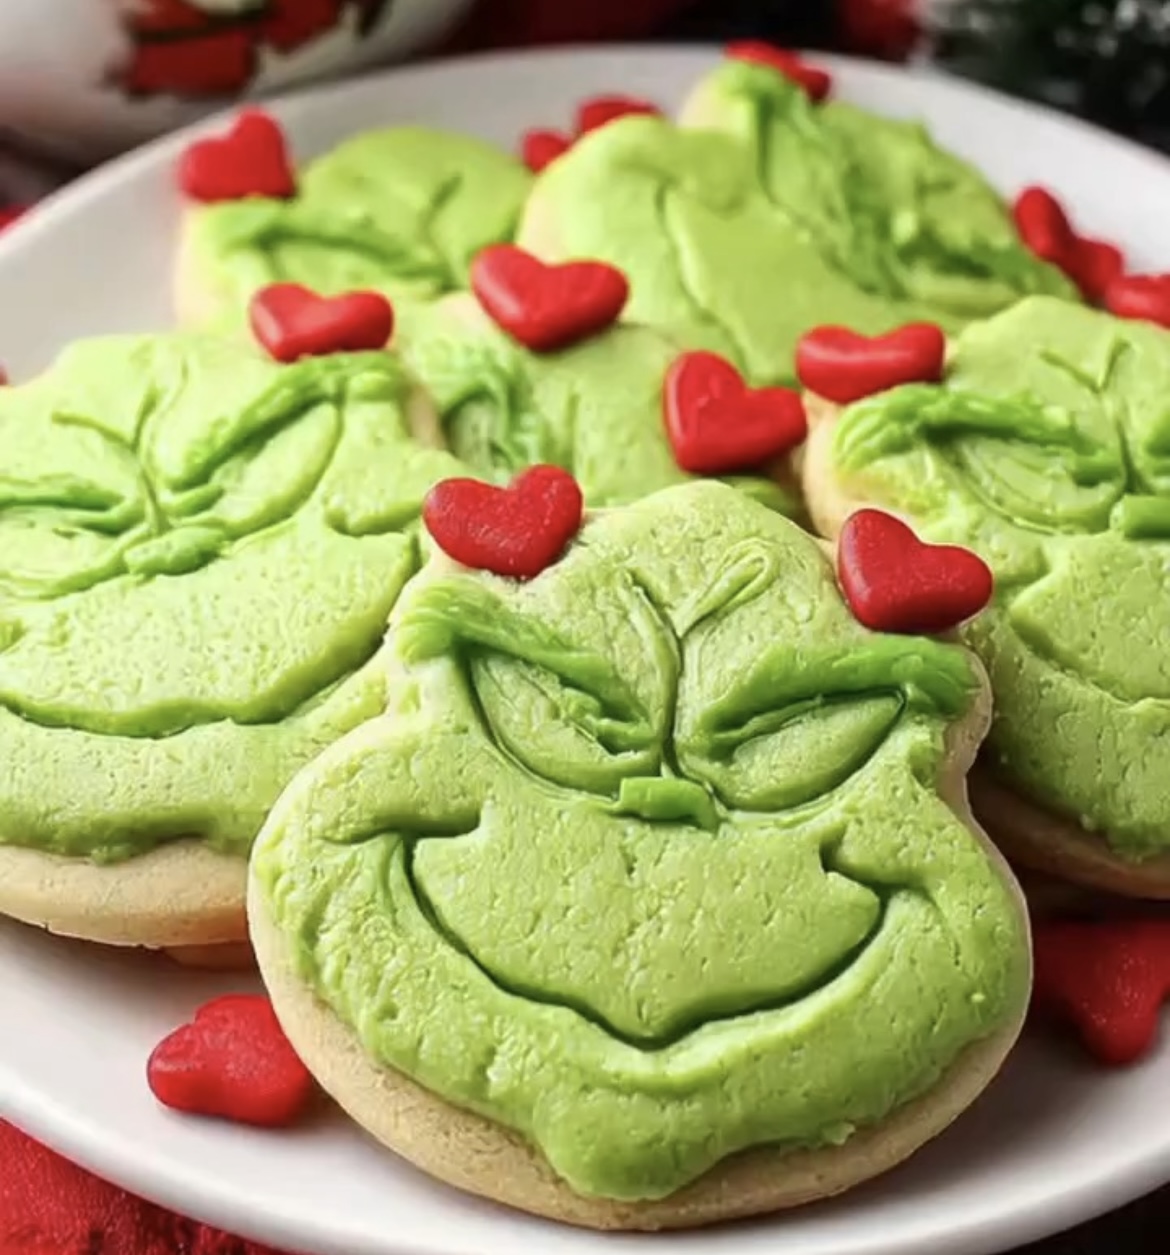
These Grinch-themed sugar cookies are fun, colorful, and perfect for any holiday celebration. The bright green frosting and the classic mischievous grin make them instantly recognizable and incredibly festive. Each cookie is soft and buttery with a smooth layer of sweet frosting, topped with a little red candy heart for the final touch. These cookies don’t just look adorable—they taste rich, creamy, and full of warm vanilla flavor.
This recipe is simple enough for beginners and enjoyable for anyone who wants to bring cheerful holiday treats to the table. They’re great for parties, gift boxes, family baking nights, or Christmas dessert trays.
Ingredients
For the Cookies
- 2 ¾ cups all-purpose flour
- 1 cup unsalted butter, softened
- 1 cup granulated sugar
- 1 large egg
- 2 teaspoons vanilla extract
- ½ teaspoon almond extract (optional for extra flavor)
- ½ teaspoon baking powder
- ½ teaspoon salt
For the Frosting
- 1 cup unsalted butter, softened
- 3 cups powdered sugar
- 2–3 tablespoons heavy cream or milk
- 1 teaspoon vanilla extract
- Green gel food coloring
- Red candy hearts for decoration
Instructions
1. Start the Cookie Dough
In a large mixing bowl, cream the softened butter and sugar until light and fluffy. Mix in the egg, vanilla extract, and almond extract. Stir until smooth.
In a separate bowl, whisk together flour, baking powder, and salt. Gradually add the dry ingredients to the wet mixture. Mix until a soft dough forms. It should be smooth and not sticky.
2. Chill the Dough
Shape the dough into a disk, wrap it tightly in plastic wrap, and chill for at least one hour. This step helps the cookies hold their shape while baking.
3. Roll and Cut
Preheat the oven to 350°F (175°C). Dust a flat surface with flour, then roll out the chilled dough to about ¼ inch thickness. Use a cookie cutter in a round, oval, or Grinch-style shape. Transfer the shapes to a baking sheet lined with parchment paper.
Bake for eight to ten minutes or until the edges are set but not browned. Let the cookies cool completely before decorating.
Make the Grinch Frosting
1. Prepare the Buttercream
Beat the butter until creamy and smooth. Add powdered sugar, one cup at a time, until fully incorporated. Add vanilla extract and heavy cream until the frosting reaches a thick, spreadable texture.
2. Add the Color
Use green gel food coloring to achieve a bright, Grinch-like shade. Mix well until the color is even and vibrant.
Decorate the Cookies
1. Frost Each Cookie
Spread green frosting generously on each cooled cookie. Use a butter knife or piping bag to smooth the surface and create the Grinch’s face lines—eyebrows, eyes, nose, and the famous mischievous smile.
2. Add the Red Heart
Place one red candy heart on the top corner of each cookie. It symbolizes the Grinch’s heart “growing three sizes,” adding charm and sweetness to each cookie.
3. Let the Frosting Set
Allow the cookies to sit at room temperature for at least 20 minutes so the frosting firms up slightly. They are now ready to plate, gift, or enjoy.
Texture and Flavor
These cookies are soft in the center with lightly crisp edges. The buttery flavor of the dough pairs beautifully with the creamy frosting, creating a dessert that melts in your mouth. The bright green color makes them stand out, while the red heart brings a cheerful contrast. The frosting adds richness without overwhelming the cookie itself, creating a perfect balance.
Tips for Perfect Grinch Cookies
- Chill the dough to maintain shape during baking.
- Use gel coloring instead of liquid to keep the frosting thick and vibrant.
- Let cookies cool fully before decorating to prevent melting.
- Use a toothpick or small piping tip to draw the Grinch’s face details.
- If you want a neater design, chill the frosted cookies for a few minutes before adding line details.
Variations
- Add peppermint extract to the frosting for a festive twist.
- Use lemon extract in the dough for a lighter, citrus flavor.
- Make mini Grinch cookies for party platters.
- Add sprinkles around the edges for extra fun.
Storage
Store cookies in an airtight container at room temperature for three days. For longer storage, refrigerate for up to one week or freeze for up to two months. If freezing, place parchment between layers to protect the frosting.
Why These Cookies Are Loved
These cookies stand out because they combine fun decoration with delicious homemade flavor. They look impressive without requiring professional skills, making them a great family activity. Their bright color and expressive faces bring smiles to both kids and adults. They also make thoughtful edible gifts, especially wrapped in clear bags or festive tins.