If you’re looking for a simple, rich, and irresistibly chocolatey treat, these No-Bake Chocolate Crunch Bars are the perfect recipe to add to your dessert collection. They’re everything you love about homemade sweets: quick, delicious, and made with only a handful of pantry-friendly ingredients. With their glossy chocolate coating and crunchy center, they’re a guaranteed crowd-pleaser for parties, holidays, school events, or a cozy night in.
This recipe is especially loved because it requires no oven, no complicated steps, and no special baking skills. Anyone can make it—yet the result tastes like something from a gourmet chocolate shop. Let’s dive into this creamy, crunchy, melt-in-your-mouth dessert and explore how you can recreate it at home.
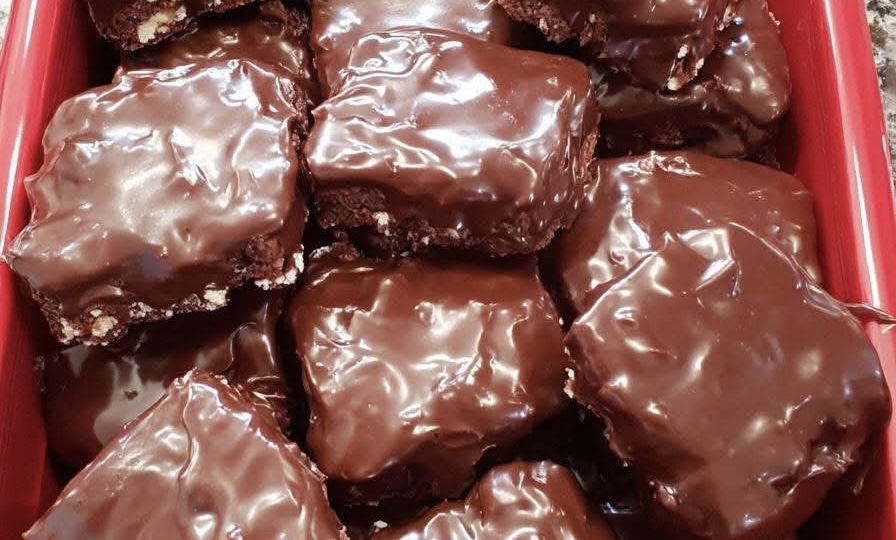
A Perfect Texture Combination
The magic of these bars comes from the contrast between textures. The inside is chewy with a pleasant crunch, created by crushed cookies, crackers, or cereal (depending on your preference). The outer layer is a thick, shiny chocolate coating that adds richness to every bite.
They hold together beautifully, yet they melt in your mouth almost instantly. These bars also stay fresh for days and even freeze well, making them ideal for meal planning or preparing ahead for gatherings.
Ingredients You’ll Need
- 2 cups semisweet or milk chocolate chips
- 1 cup crushed biscuits, graham crackers, or digestive cookies
- ½ cup chopped nuts (optional – pecans, almonds, or walnuts work great)
- 3 tablespoons butter
- 1 teaspoon vanilla extract
- A pinch of salt
- Additional chocolate for coating
You can easily customize this base recipe. Some people add mini marshmallows, shredded coconut, or caramel bits. Feel free to experiment!
How to Make No-Bake Chocolate Crunch Bars
Step 1 – Prepare the Crunch Mix
Place your crushed cookies or crackers in a large bowl. Add nuts if using. The pieces should be small but not completely powdered—this is what gives the bars their crunch.
Step 2 – Melt the Chocolate
In a microwave-safe bowl, add chocolate chips, butter, and a pinch of salt. Microwave in 20–30 second intervals, stirring each time, until completely smooth.
For a stovetop option, melt the mixture over low heat in a saucepan.
Step 3 – Combine and Mix
Pour the melted chocolate over the crunch mixture. Add the vanilla extract and stir until everything is fully coated and combined.
Step 4 – Press into a Pan
Line a baking dish with parchment paper. Spread the mixture evenly and press it down firmly with a spatula or the back of a spoon. This makes the bars compact and helps them hold together.
Step 5 – Chill
Refrigerate for at least 1–2 hours, or until firm.
Step 6 – Coat with Chocolate
Once chilled, cut the mixture into squares. Dip or drizzle each piece with additional melted chocolate to create the glossy outer shell seen in the picture. Let them chill again until the chocolate sets.
Serving Suggestions
These bars are rich and satisfying on their own, but you can elevate them by:
- Sprinkling sea salt on top
- Adding crushed nuts or coconut flakes
- Drizzling white chocolate for contrast
- Serving with ice cream
- Pairing with coffee or milk
They’re perfect for giving as gifts—just wrap them individually after chilling.
Storage Tips
- Refrigerator: Keep in an airtight container for up to 1 week.
- Freezer: Freeze for up to 3 months. Just thaw for 10–15 minutes before serving.
These bars keep exceptionally well and maintain their flavor and texture even after freezing.
Why You’ll Love This Recipe
- No baking required
- Great for beginners
- Uses simple pantry ingredients
- Easily customizable
- Freezer-friendly
- Perfect balance of sweet, chewy, and crunchy
Whether you need a last-minute dessert or simply want to satisfy your chocolate craving, this recipe is guaranteed to become a household favorite.